Battery change
Required tools
-

Screwdriver: Phillips head
-

Battery LiFePO 3.2v
Can't find an original battery?

Can't find an original battery?
Even though the battery delivered from factory is using a chemistry LiFePO4/LFP in a 3.2 voltage, your Sol lamp is designed to also accommodate a chemistry NMC in a 3.7 voltage.
If you are only able to source an NMC 3.7V battery, you may convert your lamp's software if necessary following the simple. More information in a further Step "replace battery" in this guide.
***
To ensure safety and performance, it is crucial to source a battery in either of these 3 sizes:
- 2 x cells 26mm diameter 65mm length
- 1 x cell 26mm diameter 65mm length
- 1 x cell 18mm diameter 65mm length
Step 1
Unscrew lamp casing

Unscrew lamp casing
Using a Phillips head screwdriver, carefully remove the 2 screws at the front and back of the lamp's body.
Screws are small and light, so make sure to place them in a safe spot to avoid losing them.

Step 2
Open the plastic casing

Open the plastic casing
Carefully separate the two parts of the lamp by pulling the white shade and the black base in opposite directions.
Step 3
Remove 6 top screws
Remove 6 top screws
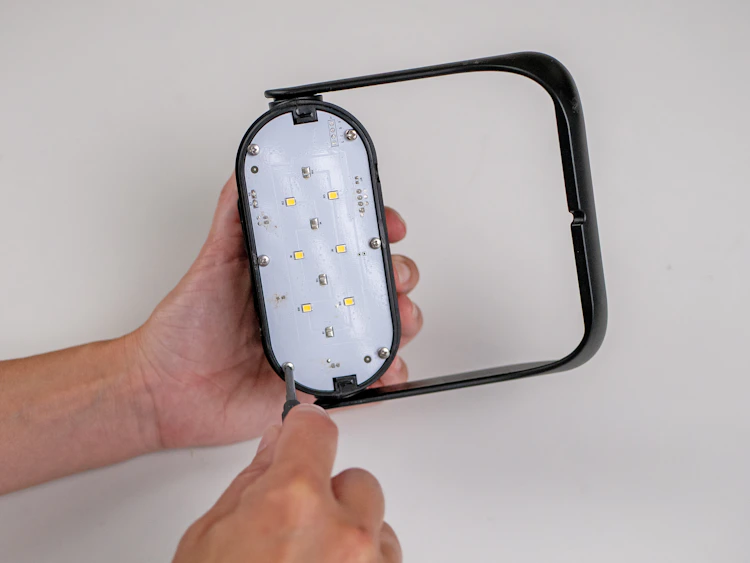
After removing the shade, the main electronic circuit board (PCB) will be exposed.
Using a Phillips head screwdriver, remove the 6 screws around the entire perimeter of the board.
Step 4
Remove electronic circuit board and frame

Remove electronic circuit board and frame
Once all 6 screws have been removed, carefully separate the white plastic frame from the black base of the lamp.
Make sure to pull gently as cables connect the two parts.
Step 5
Disconnect harness cables

Disconnect harness cables
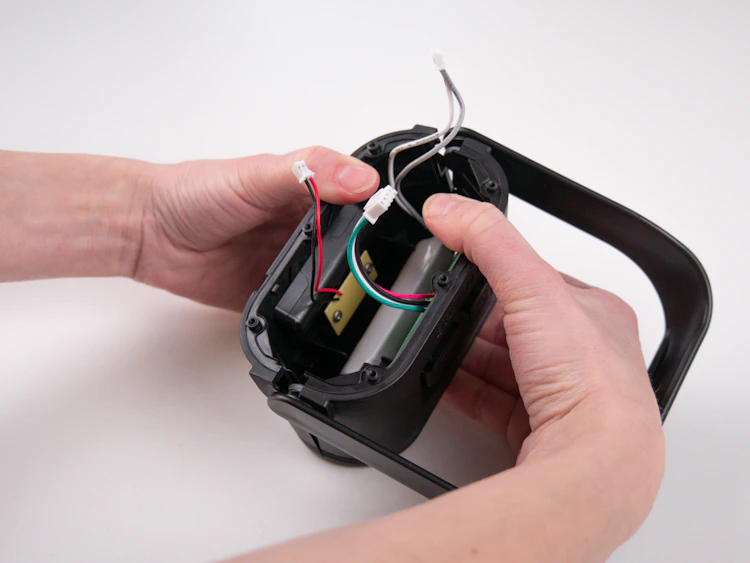
Underneath the electronics board, there are 3 sets of cables.
Gently pull the cables away from the board, and disconnect everything.
Make sure to pull the colored cables and not to pull from the white connector as this might lead to breaking the connector itself.


Step 6
Remove main PCB

Remove main PCB
Remove the board from the lamp, and take the plastic frame that sits around it off.
Step 7
Open bottom case
Open bottom case
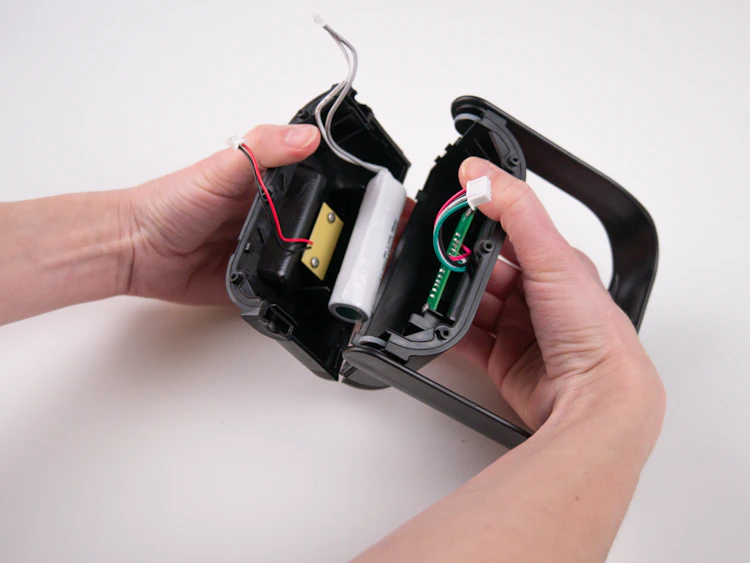
Using your hands, pull apart the two halves of the bottom case.
Step 8
Replace battery
Replace battery
Make sure the new battery matches the physical size, voltage and chemistry of the old battery. It is possible to install bigger/smaller batteries with a different mAh capacity, as long as the voltage is either 3.2V or 3.7V.
If the battery you have sourced is 3.7V, follow this guide:
>>> Battery voltage: Software switch
New battery MUST be marked as: LiFePo (Lithium chemistry) - Voltage 3.2 V. If you are only able to source an NMC 3.7 V battery, follow the guide in the link underlined above.

Example of a compatible battery:
LiFePo 3.2v 1600mAh

Example of a compatible battery:
LiFePo 3.2v 3600mAh

Example of a compatible battery:
LiFePo 3.2v 7200mAh
Old batteries are hazardous e-waste. If possible, they should be handed to a specialized party.
Step 9
Assemble base

Assemble base
To reassemble the base, align all the components, including the swiveling handle.

Put the two halves together, ensuring all components and cables remain in the correct place.

Press lightly until they stick.

Using both hands, press hard until they snap into place.
Step 10
Reconnect battery

Reconnect battery
Reconnect the battery cables to the PCB connector. Make sure to use the connector next to the round edge of the frame.
Battery must be connected at the round side of the board.
Step 11
Reconnect remaining cables

Reconnect remaining cables
Step 12
Place top frame back

Place top frame back
Align and lightly press down the PCB and frame until it sits in place.
Step 13
Reassemble the lamp

Reassemble the lamp
Reverse each step from steps 4 to 1 to reassemble the lamp.